DNSCrypt Now in Testing
The Quad9 project treats user privacy as a first-order priority along with performance and security. Part of the concept of privacy is keeping others from seeing what DNS requests you are sending. Encryption using DNS-over-TLS has been part of Quad9’s offering since launch last year. DNSCrypt is a protocol that has been around for some time, and many open source systems support it, and today we announce that we are moving out of internal trials and into beta support for DNSCrypt on our anycast array.
We’re hoping that the way we have built out our dnscrypt-proxy config fragments and files, including signing, makes it an easy drop in for testing. Once this test phase is complete, we’ll be working to get included in the DNSCrypt public resolver list. We’ll do a short update when this complete but we anticipate no significant changes from beta to production status.
You can download the Quad9 specific config from https://www.quad9.net/quad9-resolvers.toml.
Then just cut and paste the configuration fragment into your dnscrypt-proxy.toml file. If you comment out other public resolvers, you can test with only Quad9 servers.
If you’re just looking for the Quad9 stamps go to https://www.quad9.net/quad9-resolvers.md.
More Info:
Contact our support team if you need more detailed instructions or have any questions.
We’ve tested using dnscrypt-proxy on Mac, Windows, Linux, and iOS (using DNS Cloak). Also, we tested out Simple DNScrypt for Windows.
Instructions for Simple DNScrypt
There are instructions below for modifying the config to test with Simple DNScrypt for Windows.
1. Download and install the appropriate version of Simple DNSCrypt from https://simplednscrypt.org/ (Make sure you have their prerequisites installed)
2. Download the file located at https://www.quad9.net/quad9-resolvers.toml
3. Open the “dnscrypt-proxy.toml” file located in the Simple DNSCrypt folder (Unless you moved it or changed the install path, this should be located at “C:\Program Files\bitbeans\Simple DNSCrypt x64\dnscrypt-proxy”). You will need administrator privileges for this task.
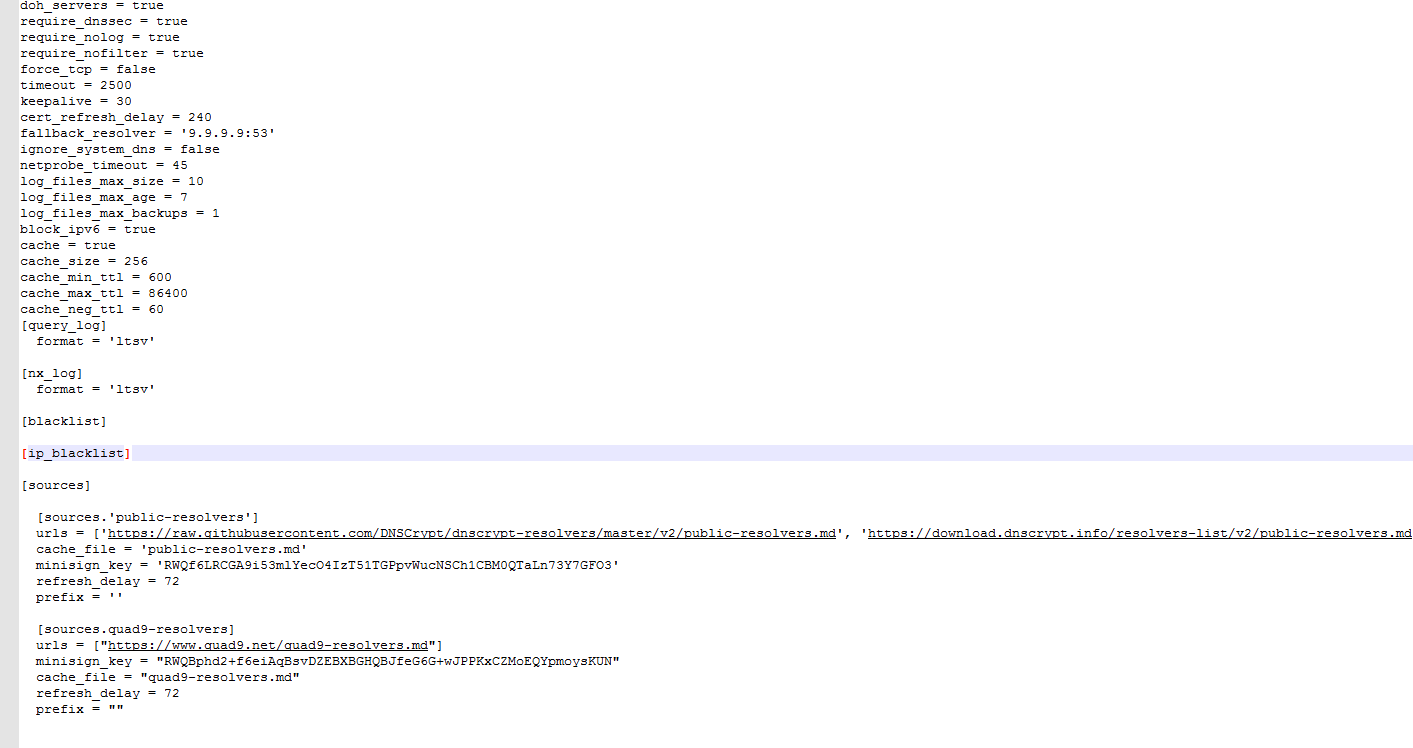
4. Append the contents of “quad9-resolvers.toml” to the end of the “dnscrypt-proxy.toml”, after the [sources] section. Make sure to save your changes.
5. Your “dnscrypt-proxy.toml” file should now look something like this:
6. If you already started Simple DNSCrypt, make sure to completely close any running instance of it.
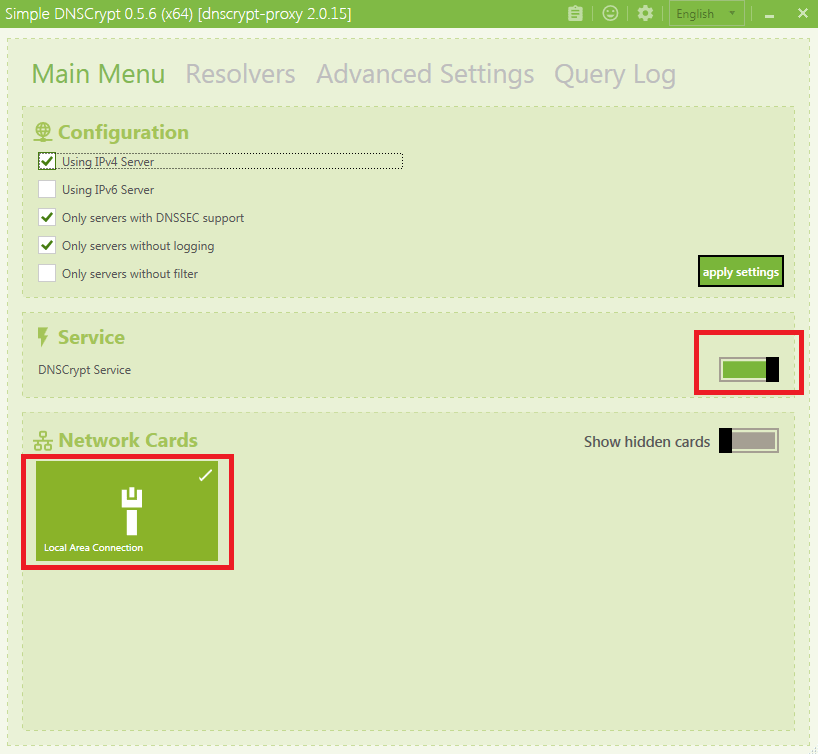
7. Open the program and start the DNSCrypt Service using the toggle bar, then select the Network Card you’d like to use from the available list.
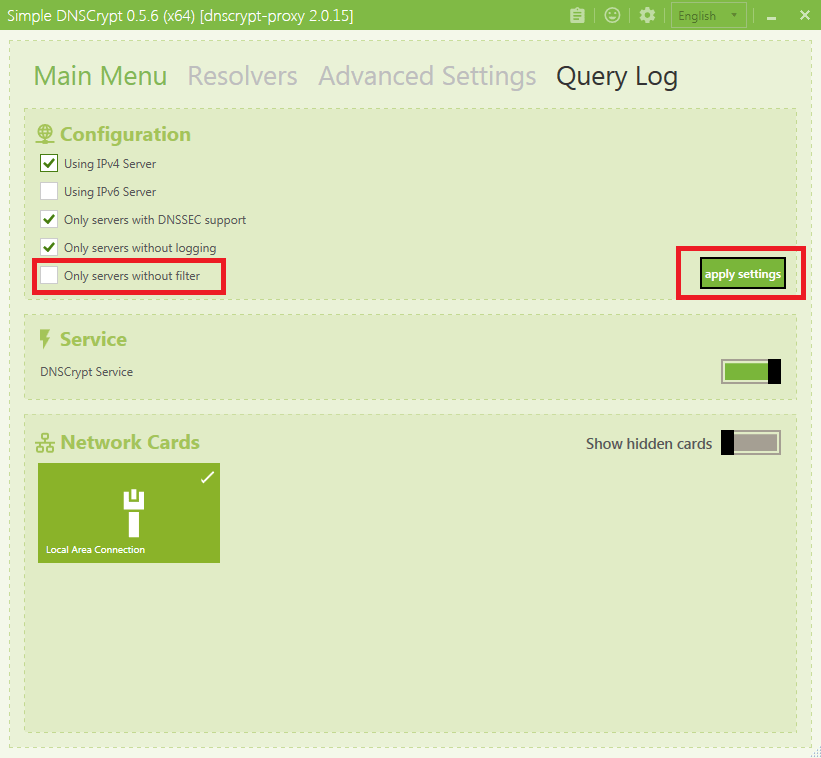
8. Then, disable the “only servers without filter” option in the configuration section, and hit “apply settings”.
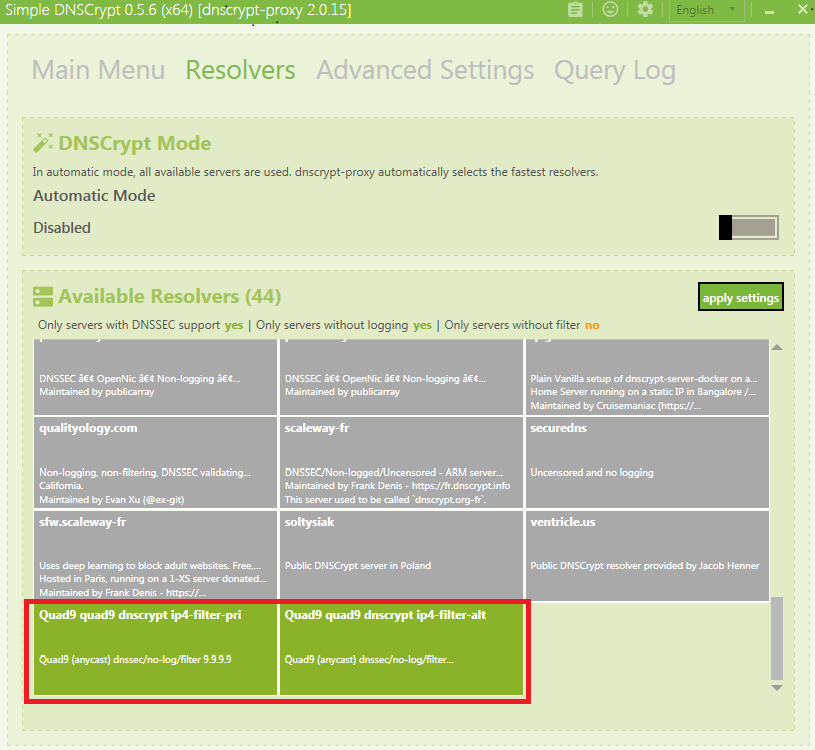
9. Next, select the Resolvers tab at the top. From the Available Resolvers select “quad9 dnscrypt ip4-filter-pri” and “quad9 dnscrypt ip4-filter-alt”. Then, disable Automatic Mode, and hit “apply settings”. Note: If you do not see quad9 in the resolvers list, turn off dnscrypt, close the program entirely, and redo steps 3-5.
10. To test if your configuration is working properly, go to https://www.dnsleaktest.com/results.html and perform an extended test. If you followed these instructions successfully your results should look like this:
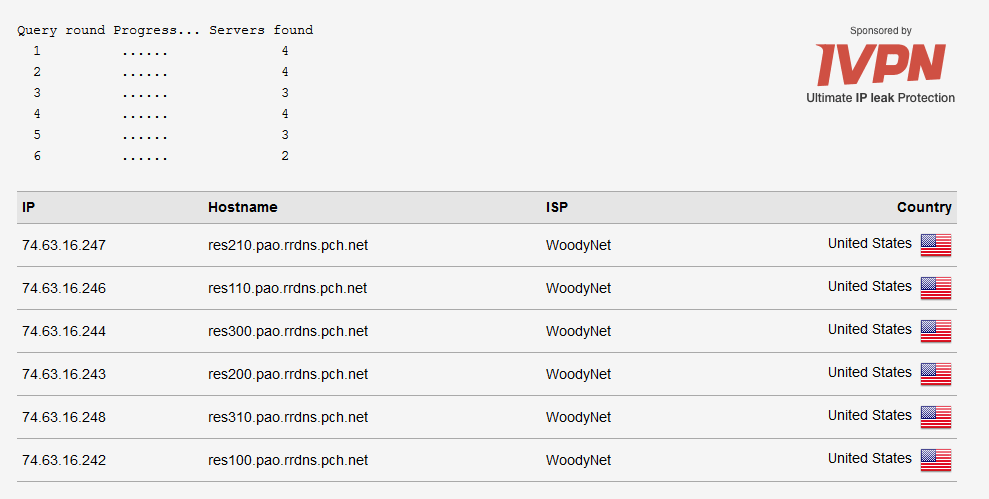
**PCH is one of our founding partners and provides much of the IP networking infrastructure that allows Quad9 to have a worldwide presence.